Use the Q2 Maintenance Manual for the exact printer and retain its different ranges for different components. It does not describe one universal lubrication interval. Check the machine’s condition as well as elapsed time: dirt, dry motion, increased resistance, material workload, and the lubricant already present can change which source instruction applies.
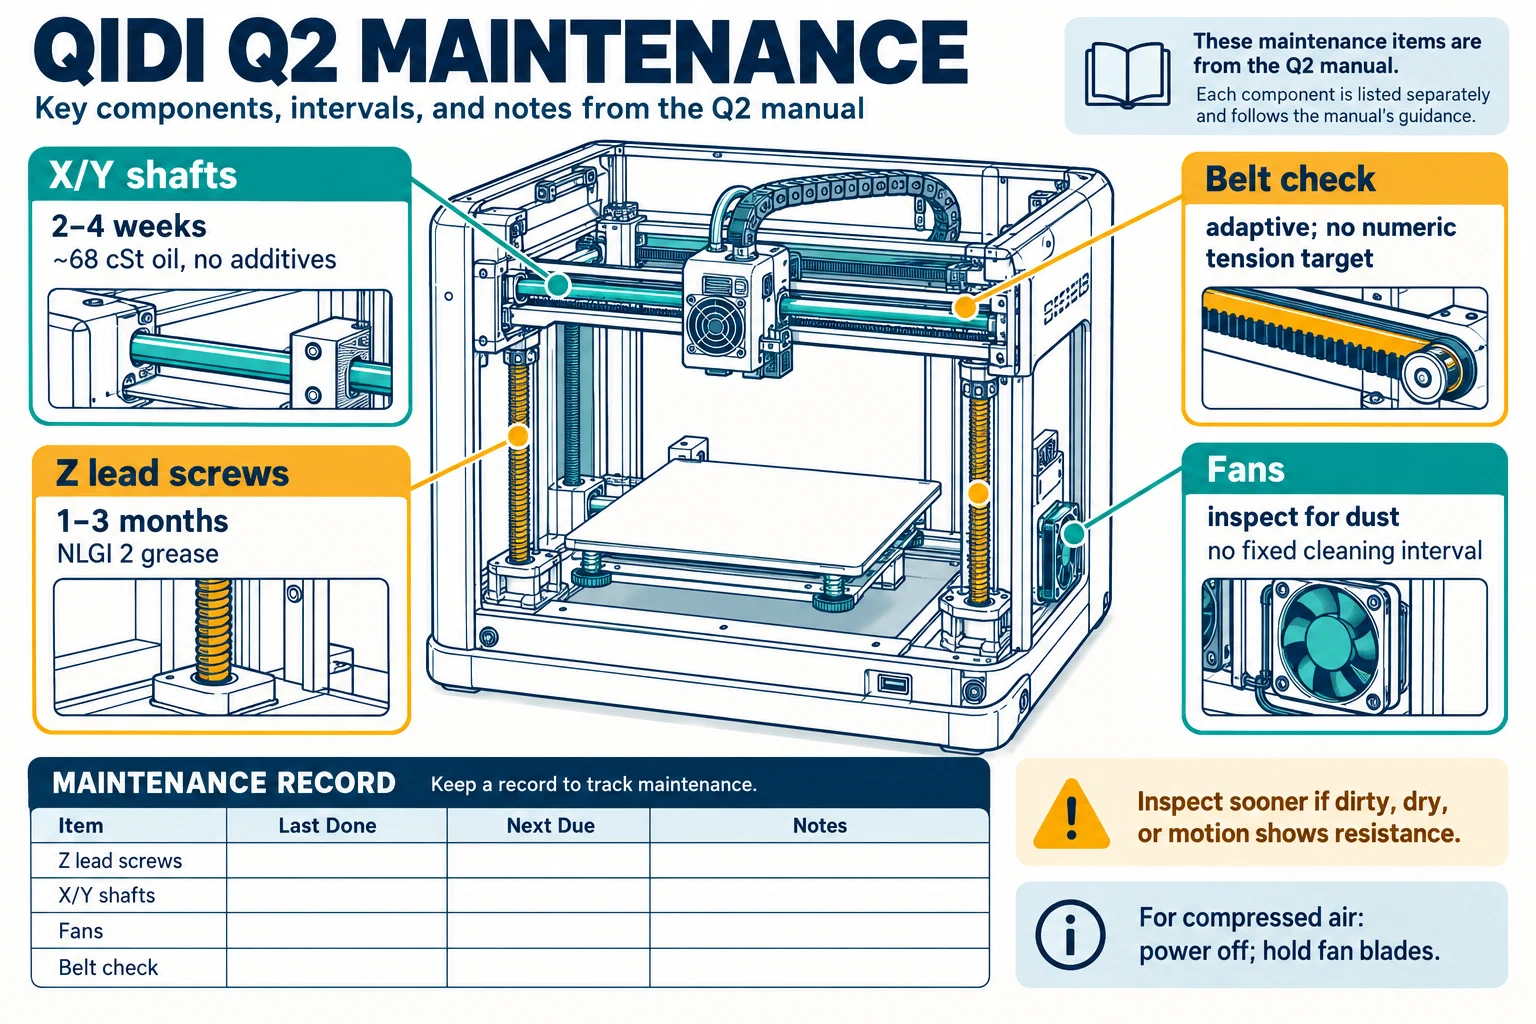
Keep lubrication tied to the named axis
The manual gives a one-to-three-month range for the Z lead screws and says to inspect sooner if they are dirty or motion shows resistance. It gives a shorter two-to-four-week range for the X and Y shafts, with earlier attention when they are dirty or dry and under the manual’s high-temperature or lower-quality-oil conditions. Keep those entries separate in the checklist; a service recorded for the Z lead screws does not complete the X or Y shaft task.
The source specifies NLGI 2 grease for the lead screws and approximately 68 cSt oil without additives for the shafts. Use the specified lubricant only on the named component and follow the manual’s cleaning and application steps. Do not substitute a product because it is marketed for another printer, add lubricant over contaminated residue, or use a quantity or procedure not stated for the Q2.
Inspect fans without creating a new fault
The Q2 manual calls for checking the four fans for dust but does not give a fixed fan-cleaning interval. Inspect their condition as part of the documented maintenance checks and record any buildup, noise, or failed operation. Before using compressed air, power the printer off and hold the fan blades as directed so they do not spin freely. Do not touch wiring or remove a guarded component unless the complete Q2 procedure authorizes that step.
The manual also describes an adaptive belt check without publishing a numeric tension target. Do not infer a target from sound, a frequency tool, deflection, or another model’s values. If the belt check or any linked service instruction does not provide a clear safe adjustment and endpoint for the Q2, record the observation and seek the complete manufacturer procedure rather than tightening by guesswork.
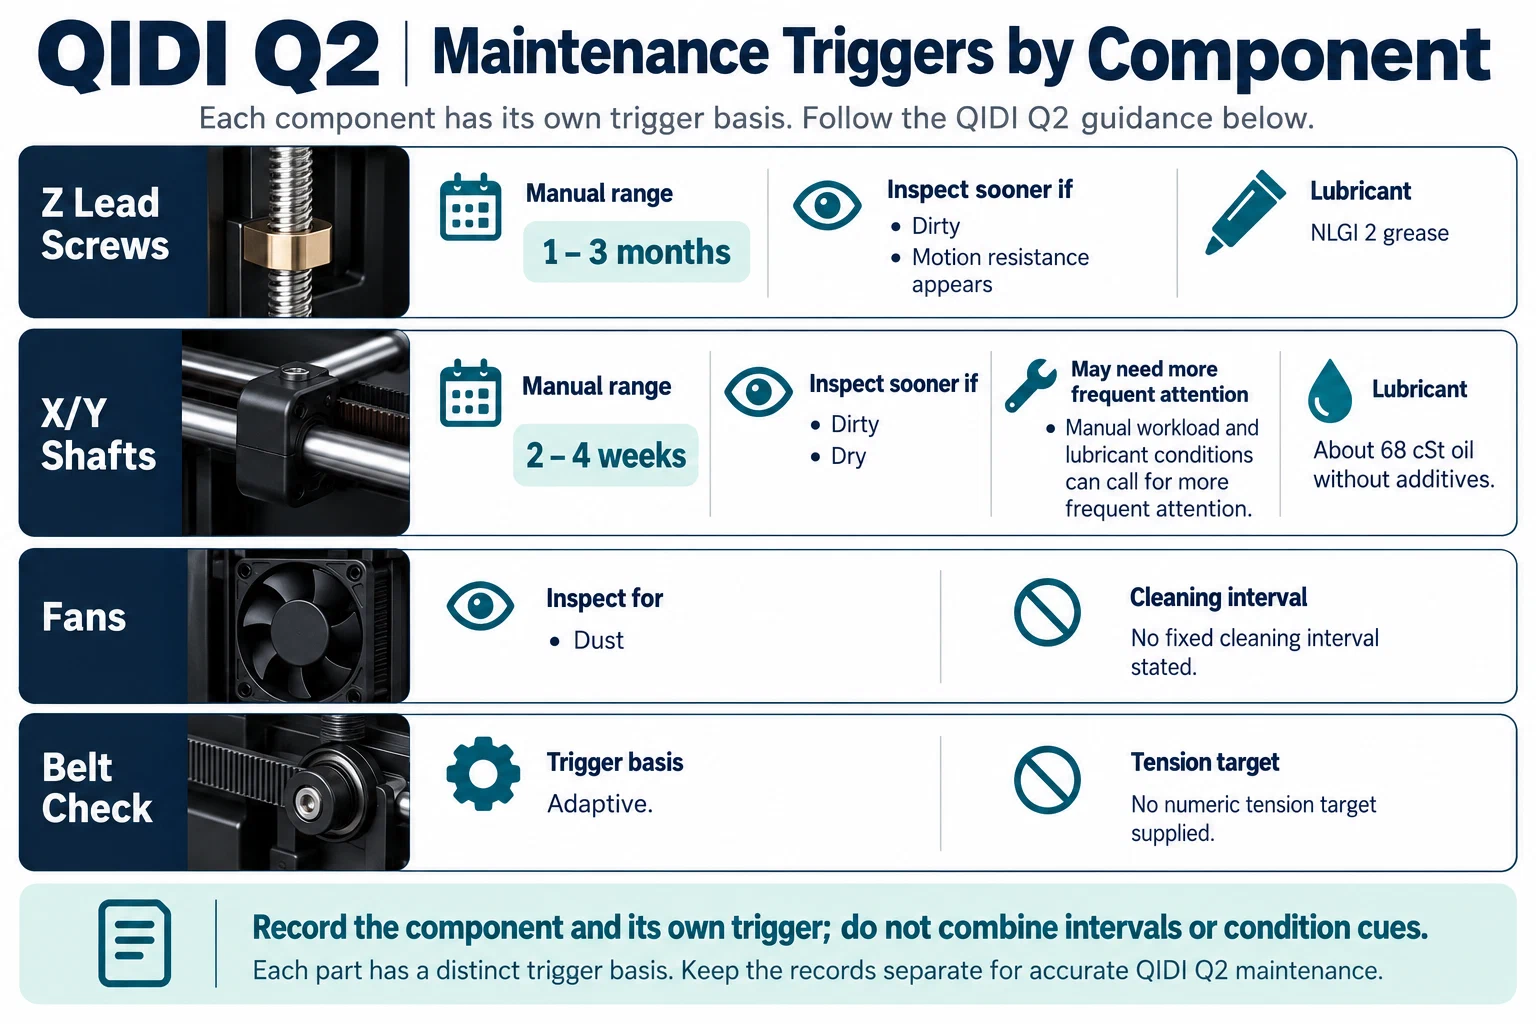
For each task, write down the Q2 variant, date, condition, usage and material context, named component, source instruction, action, and result. Record calibration or a representative print only when the service procedure calls for it or the change affects that function. Continue with the general belts, rails, fans, and sensors guide for symptom triage and repair verification after a replacement. This page does not provide a Q2 repair procedure where the manual’s complete service steps are unavailable.
Back to top ↑