Under-extrusion or no extrusion can point to a restricted nozzle, but the symptom alone does not establish the cause. The H2S guide describes three separate unclogging options; it does not require using all three in sequence.
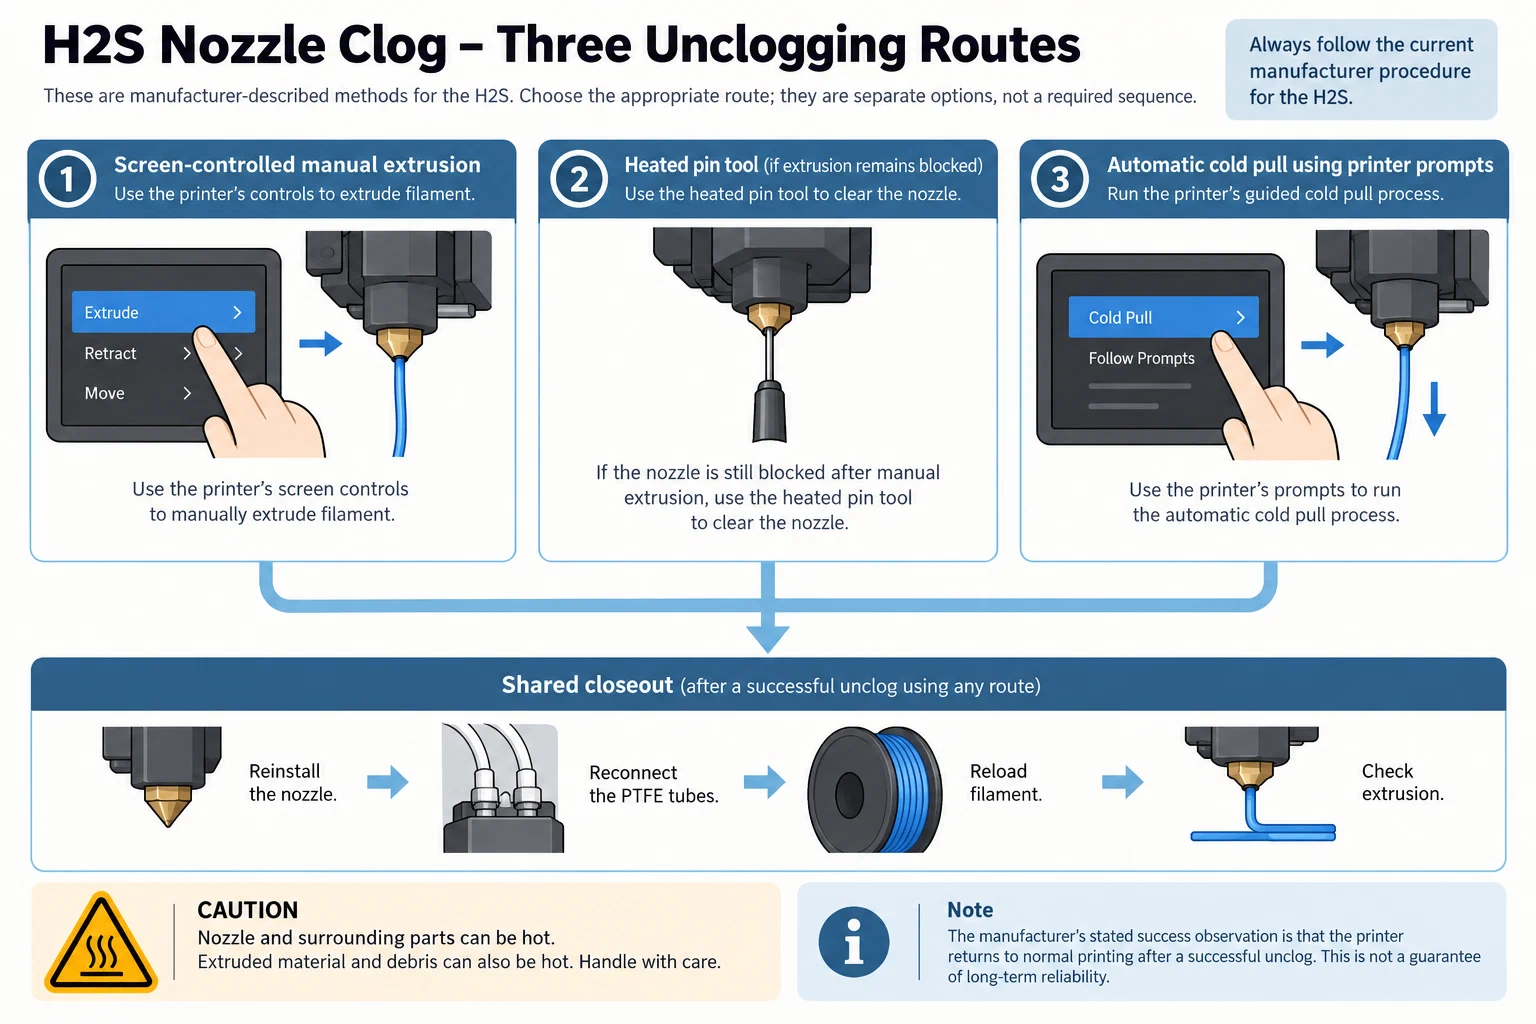
Choose only the route that fits the H2S procedure
| Manufacturer-described option | What the H2S guide says |
|---|---|
| Screen-controlled manual extrusion | Set the nozzle slightly above the loaded filament’s recommended temperature and use the printer’s loading control. The guide’s 250°C value is a PLA example, not a setting for other materials. |
| Heated pin tool | If extrusion remains blocked, the guide names a 220°C pin-tool method. Hot debris can eject; keep your face clear and follow the guide’s protective instructions. |
| Automatic cold pull | Use Toolbox → Nozzle Cold Pull Maintenance and select parameters for the nozzle and material. The guide illustrates a 0.4 mm nozzle with PLA and PLA cleaning filament; those examples are not universal. |
These are H2S-specific routes. The manufacturer’s guide says some steps require the printer off and nozzle fully cooled; follow the stated machine state for the selected operation rather than assuming one state applies to all three. Nozzle surfaces and ejected material can be hot.
Check the result
For the shared closeout, reinstall the nozzle, reconnect the PTFE tubes, reload filament, and check extrusion. The manufacturer describes normal printing as the success observation. If clogging or weak extrusion remains, its guide calls for repeating cleaning; a damaged nozzle may need replacement. It does not establish long-term reliability.
Use the current H2S manufacturer procedure for the full steps and exact hardware. For other printer models, start with the general nozzle and extruder-path guide . The H2S maintenance schedule covers recurring care, and repair verification covers checks after a component replacement.
Back to top ↑